Using a random smart bulb with Home Assistant
Post written: 11 Nov 2024
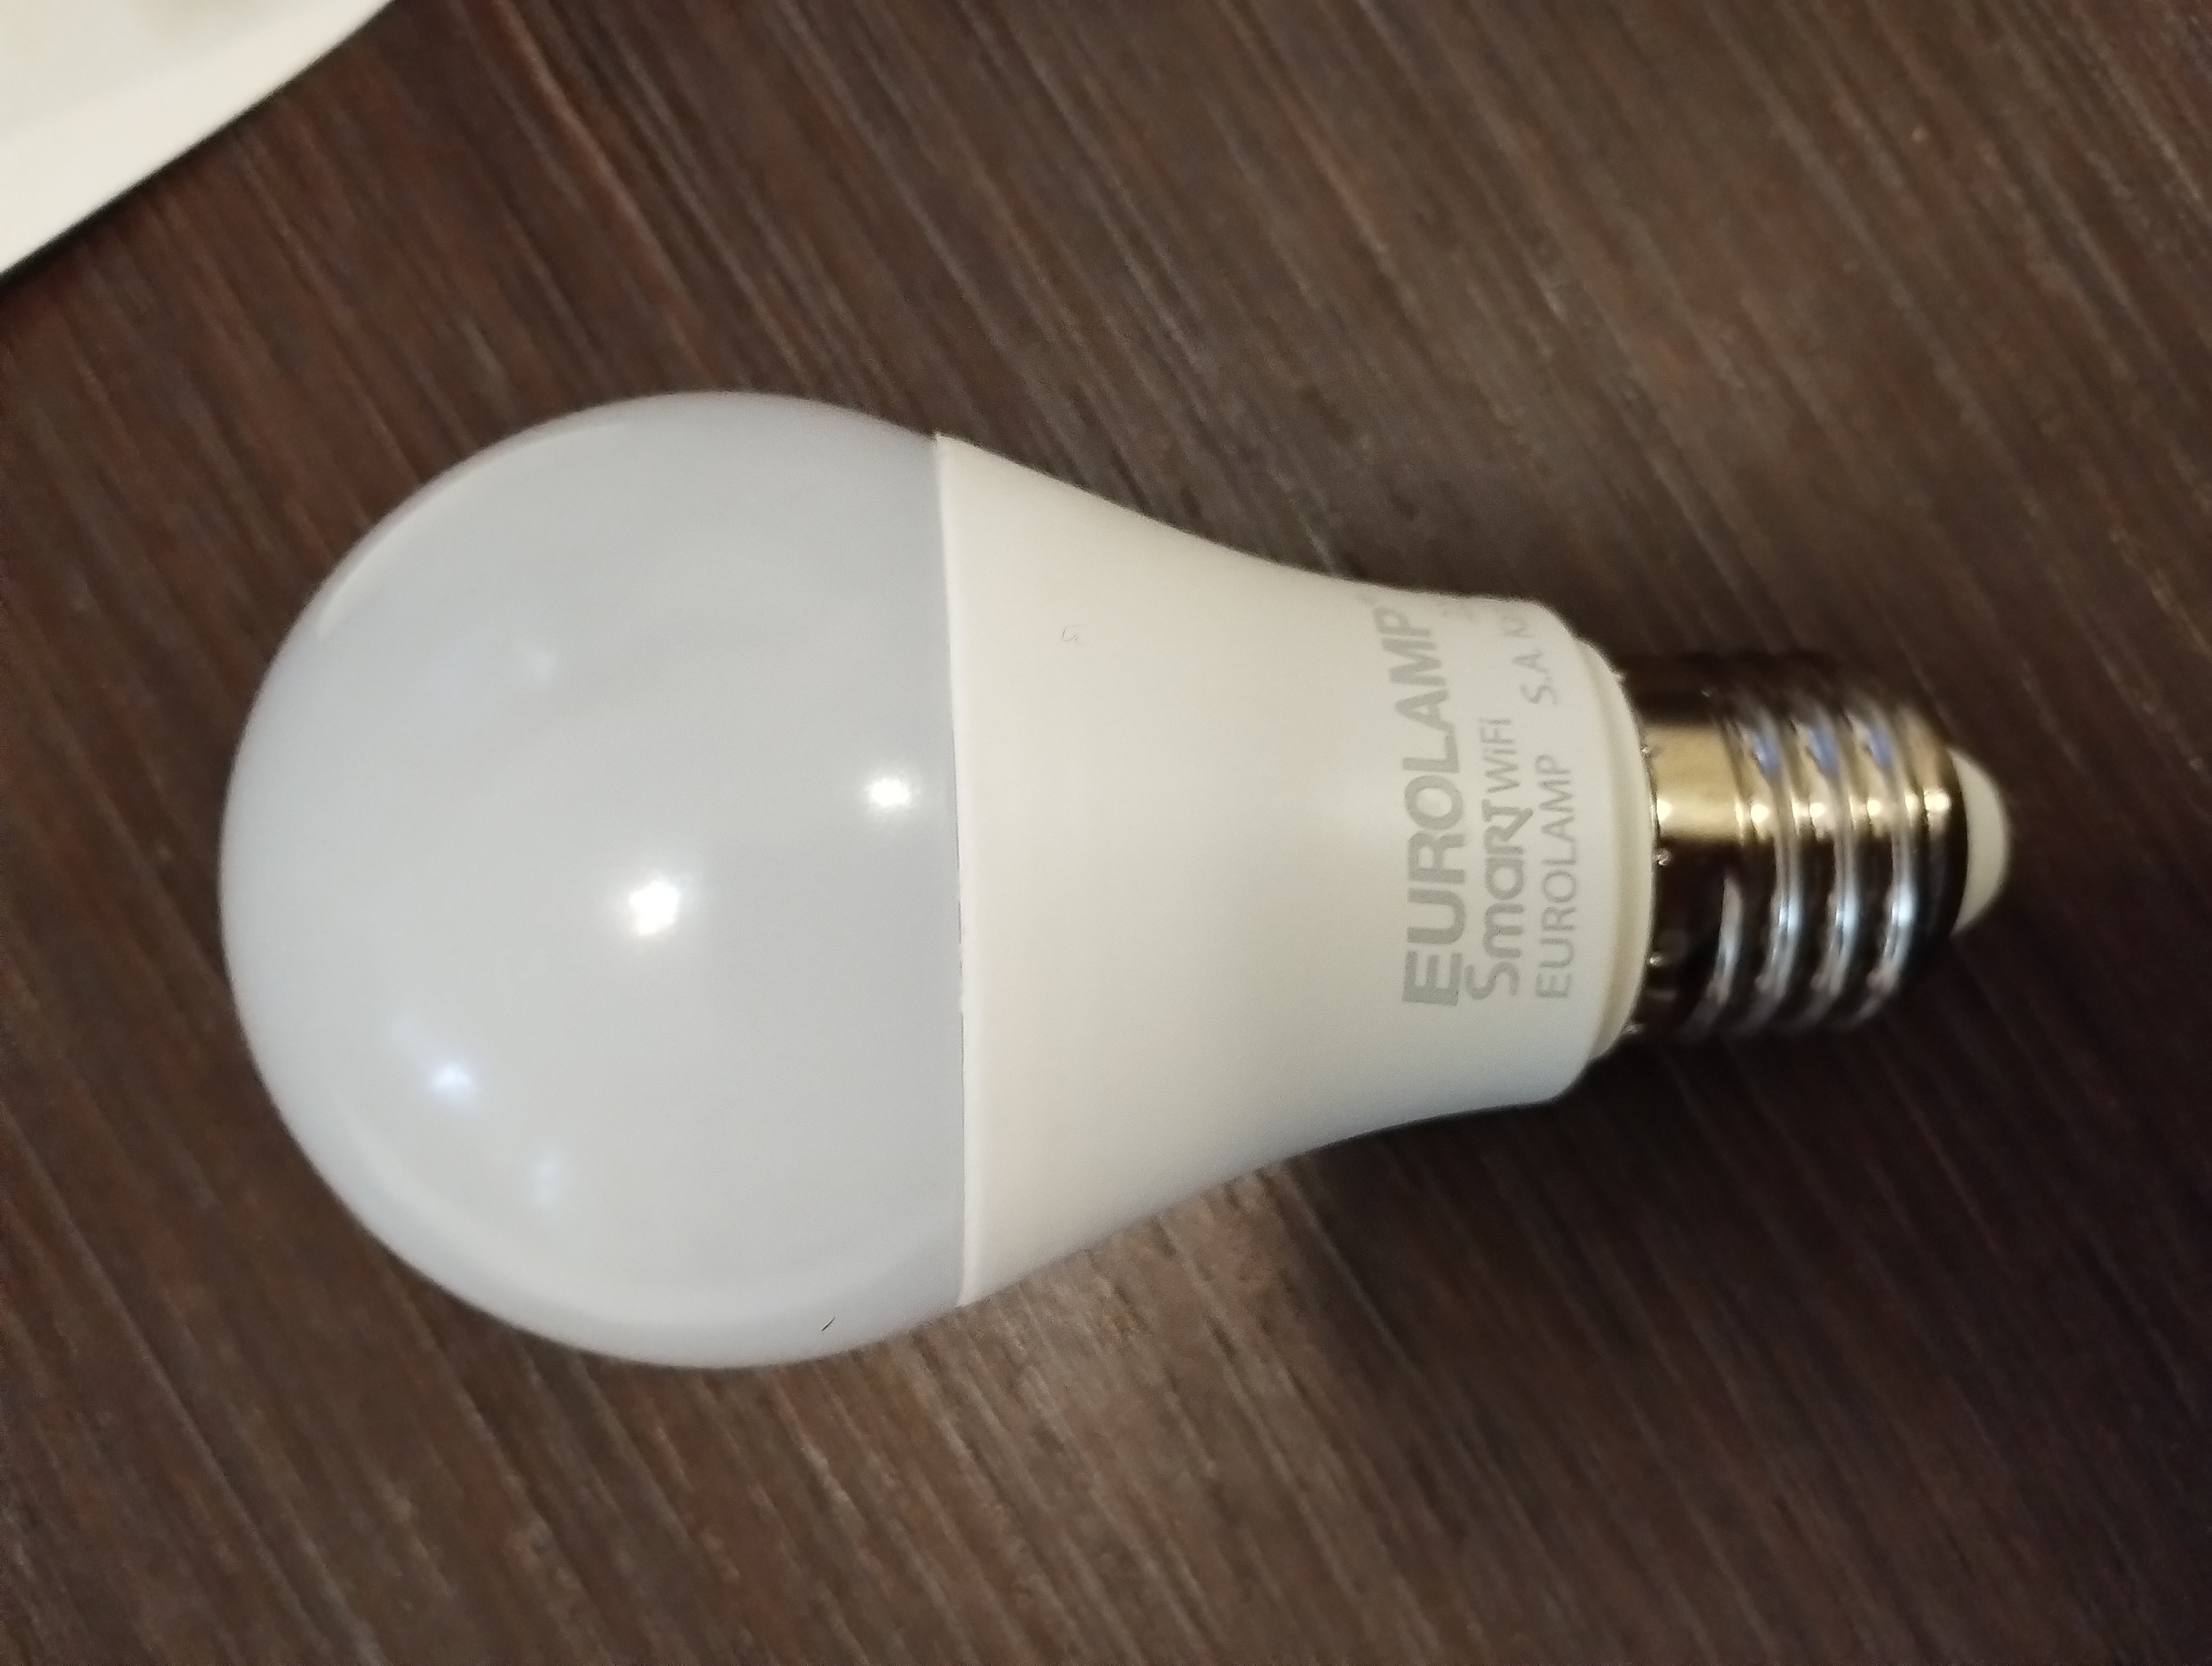
Yesterday, I got a cheap smart bulb from a random store. Its label wrote “Eurolamp Smart WiFi”.
I wanted to use it with Home Assistant, but Home Assistant didn’t have support for its brand.
And that’s how I spent almost 4 hours trying to get this working.
Identifying the device
Because this is brand is available only on my country, I couldn’t find anyone that had it except for a guy on this forum thread. From this thread I got some information about the device, like that it had a BK7321N module and that it might be a Tuya device. Tuya devices are basically everywhere and there are famous for a firmware bug that allows custom firmware sideloading. To check if this really is the case, I downloaded the proprietary “Tuya Smart” app on my phone and connected the device. And sure enough, it was a Tuya device.
Cloudcutting
After hours of searching and trying random things, I found tuya-cloudcutter. This is a program that exploits the vulnerability to jailbreak Tuya devices and allow them to run locally. It can also flash custom firmware to the device. And that is what I did. To do this you need:
- An exploitable (some devices have patched firmware) Tuya device
- A computer with WiFi
Steps:
-
Install Docker on your machine using the official instructions.
- Clone the git repository:
sudo apt install git # (If you don't use an apt-based distro, subsitute as needed) git clone https://github.com/tuya-cloudcutter/tuya-cloudcutter.git - Execute the script and wait for it to build the docker image.
cd tuya-cloudcutter sudo ./tuya-cloudcutter.sh -
When it asks you if you want to just detach from the cloud or flash 3rd party firmware, select
2) Flash 3rd Party Firmware -
It should ask you to choose the desired firmware to flash. If your device has a Beken chip (model number starts with
BK) like me, you should choose OpenBeken. If it has an ESP chip (chip model number starts withESP), then you should choose ESPHome-Kickstart. -
When it asks you the question
How do you want to choose the device?, answerBy manufacturer/device nameif your device is known and it could be on the list. If it is not however (like mine), chooseBy firmware version and name. You can find the firmware version by adding the device in the official “Tuya Smart” app, then tapping the device, tapping the edit icon on the top right, and checking for available updates. - Now the procedure should begin. If it asks you to kill some processes say yes. It should ask you to put the device into AP mode a couple of times. In my case, I had to turn the smart bulb on and off four or five times until it was blinking slowly. If you have a different type of device, the procedure should be different. Follow the instructions that the script prints out and it should flash the custom firmware on the device.
Configuring the device
The rest of the guide is exclusive to OpenBeken, since that is what I flashed. If you flashed some other type of firmware, the guide is not for you anymore.
Steps:
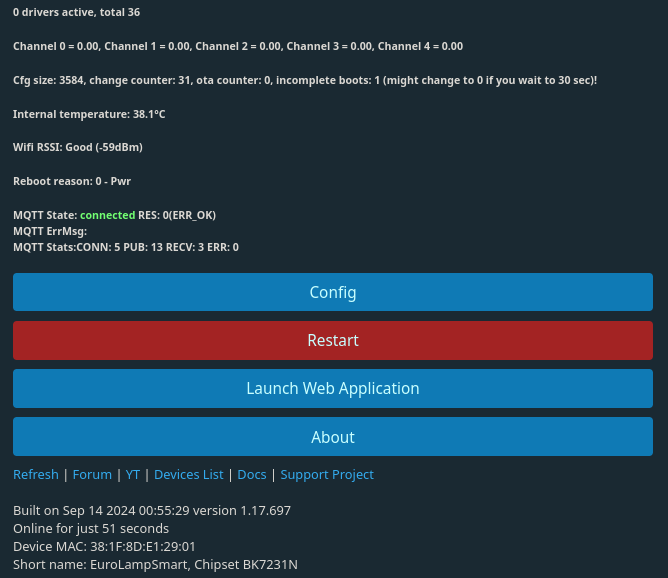
- After the flashing is done, you need to connect to a new access point named
OpenBK<the chip model number>_<some random numbers>. Once you do this, open a browser and navigate to192.168.4.1. You will be greeted by a page that looks like this:
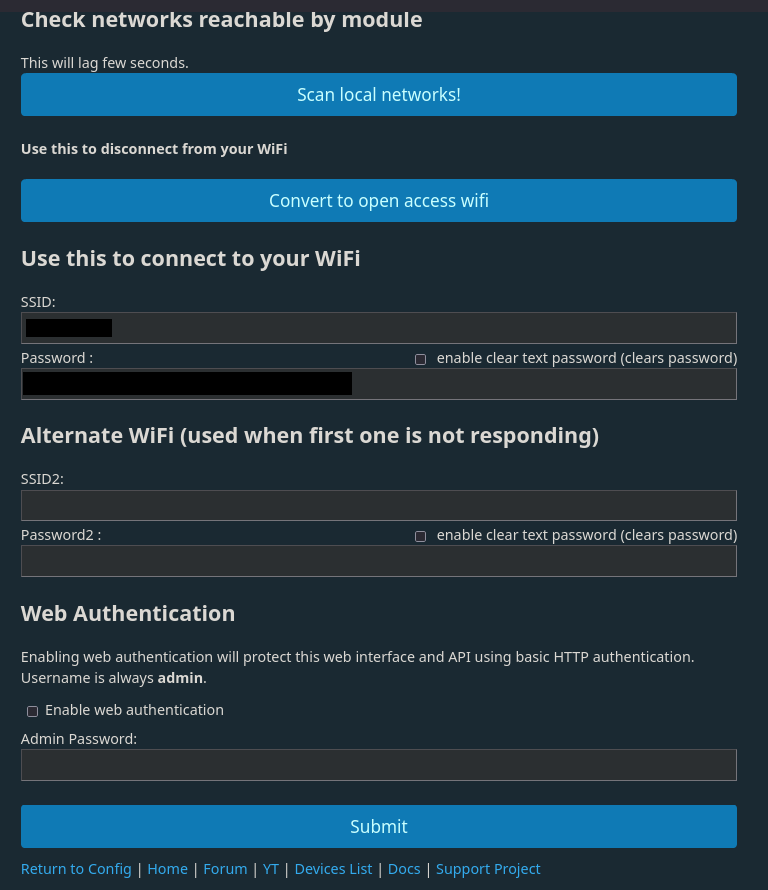
- Go to
Config>Configure WiFi & Web. ClickScan local networks!to make sure that the device can see your WiFi. Then type your SSID and password on the first fields (not in the alternate WiFi fields). Make sure that you entered the credentials correctly! Failure to do so will brick your device! Finally, click Save.
-
Disconnect from the OpenBeken WiFi network and connect to yours. Find the private IP address (
192.168.x.x) of the device and navigate to it via a web browser. You should be met with the same page as before. -
Click
Launch web application. You should be met with a page that looks like this:
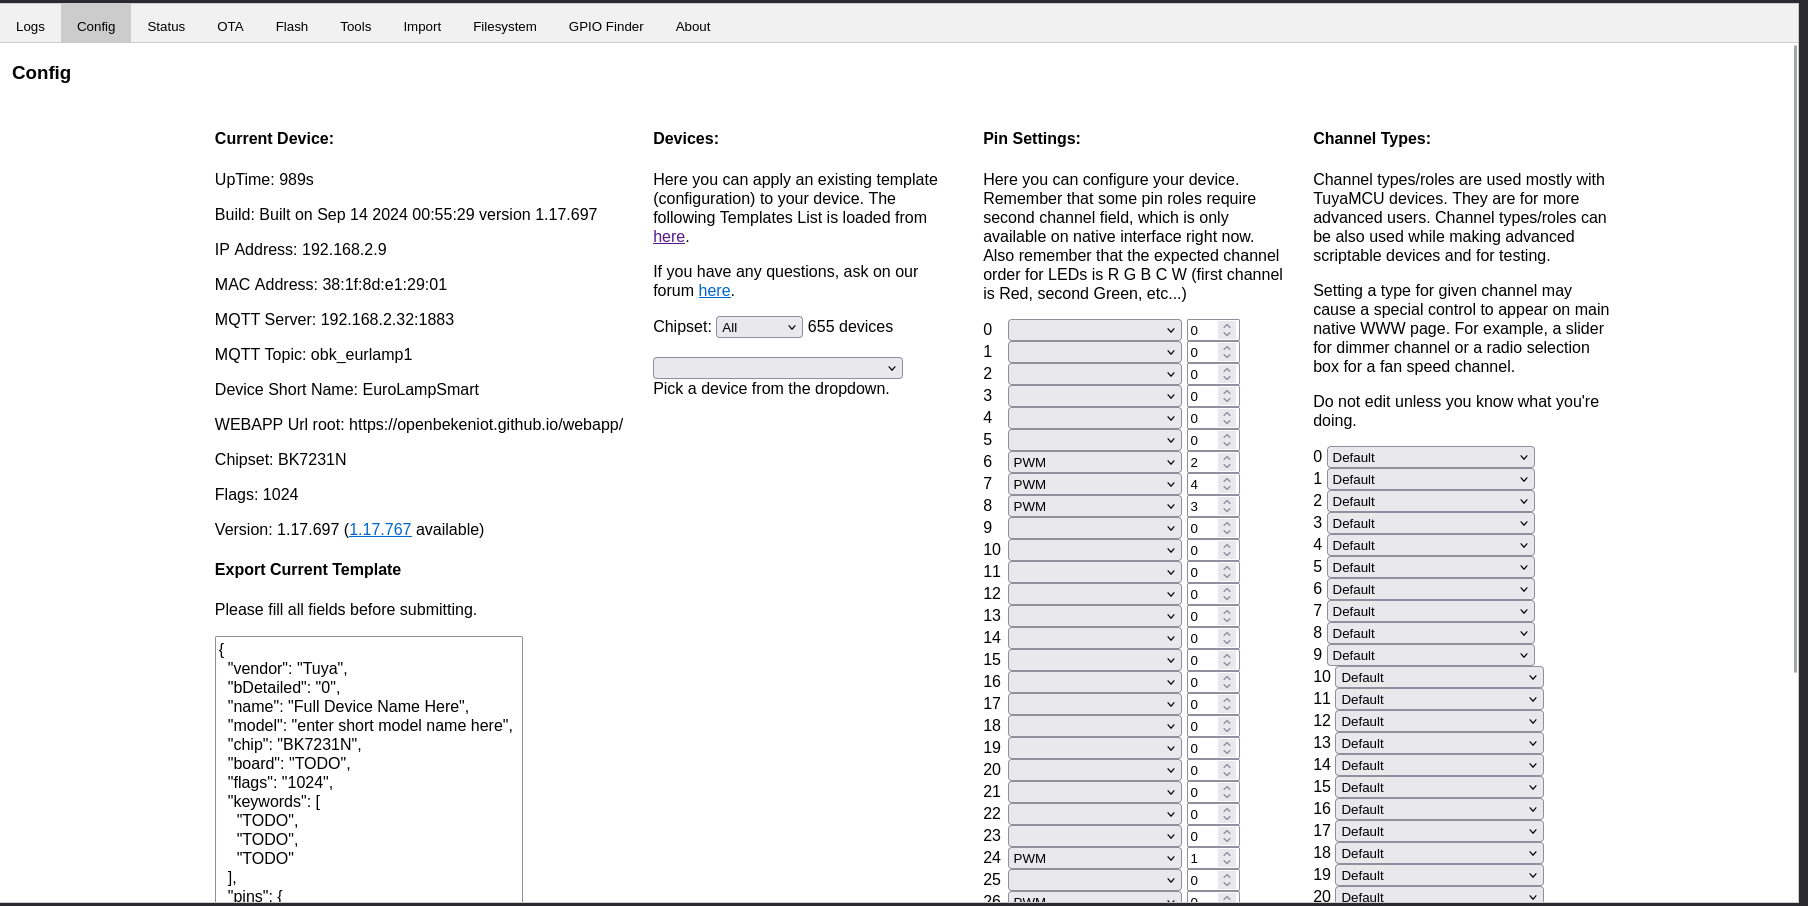
- Pick a device from the dropdown that is the same or similiar to yours. Click
Copy Device Settingsand thenSave Pins. Go back to the OpenBeken homepage (some new controls should have appeared) to check if it works. My particular device was not in the dropdown and after almost 2 hours of messing around I came up with this configuration:{ "vendor": "Eurolamp", "bDetailed": "0", "name": "Smart Bulb E27 9W A60", "model": "", "chip": "BK7231N", "board": "", "flags": "1024", "keywords": ["bulb"], "pins": { "6": "PWM;2", "7": "PWM;4", "8": "PWM;3", "24": "PWM;1", "26": "PWM;0" }, "command": "BP1658CJ_Map 1 0 2 4 3", "image": "", "wiki": "" }If you happen to have the same device as mine, you can fill in the configuration above.
Connecting to Home Assistant
You can do this only if you have a server with Home Assistant installed. Steps:
-
You need to set up an MQTT broker. You can do this either by using the Mosquitto MQTT add-on or if your Home Assistant does not support addons (like mine), install mosquitto on your server. To learn how to do this, you can follow this guide.
-
Open up the OpenBeken firmware page on your browser, and go to
Config > Configure Names. Then change the short and full name to something identifying your device.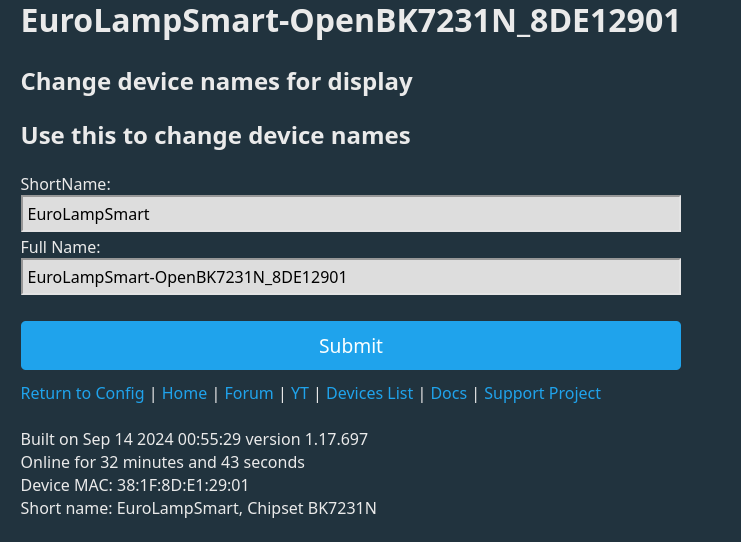
-
Then go to Home Assistant,
Settings > Devices and Integrationsand then clickAdd Integration. Choose ` MQTT > MQTT` and then add the credentials of your MQTT broker. -
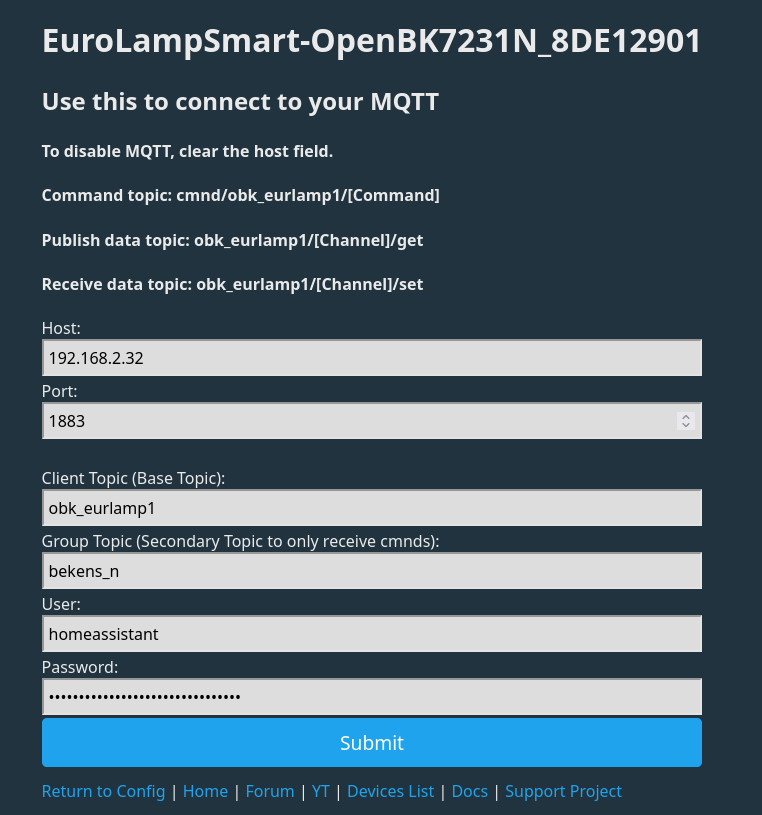
Go back to the OpenBeken page, and go to
Config > Configure MQTT. Fill in your credentials and on theClient Topicfield, fill in something identifying your device. Double check the credentials and clickSubmit.
- Finally, go back to the firmware’s homepage, click
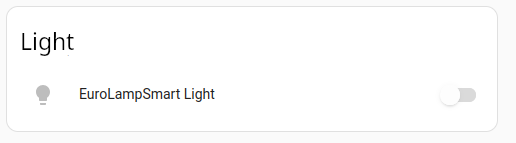
Config > Configure Home Assistantand then click ` Start Home Assistant Discovery`. Close the popup and if you did everything right some new controls should have appeared on your Home Assistant homepage!
And finally:
Conclusion
And this is how to turn a random smart lamp with proprietary firmware into a device that you can control with your own hardware and software. I hope you learned something from this guide.